Aerophone Mini - Octave Exercises - Part 1
Generally speaking, one of the most challenging technical aspects in playing a woodwind instrument is in the left thumb technique or the technique of octave passages.
Even with Wind controllers, this is one of the most delicate skills to acquire: being able to perform smooth legato passages from one octave to another, and even the Aerophone Mini, in its simplicity, isn't exempted from this "complication".
I will be publishing here, in three or four different posts, a few exercises that I have devised and that should help in developing a smooth left thumb technique.
First of all, a few basic pointers.
The left thumb should never help supporting the instrument. This means you should never push it frontward, nor should you ever pinch with strength between the left thumb and the other fingers of the hand, index finger above all.
The left thumb should never lose contact with the round plate between the two octave keys. All the movements should be performed without ever lifting it.
There are a couple of basic movements of the left thumb that we should focus on and learn how to perform: rolling and pinching.
"Rolling" means that, with the help of the base thumb muscles only, we can press the octave keys by simply rocking the thumb upwards or downwards.
"Pinching" means the we can press the octave keys by bending the thumb at the first knuckle
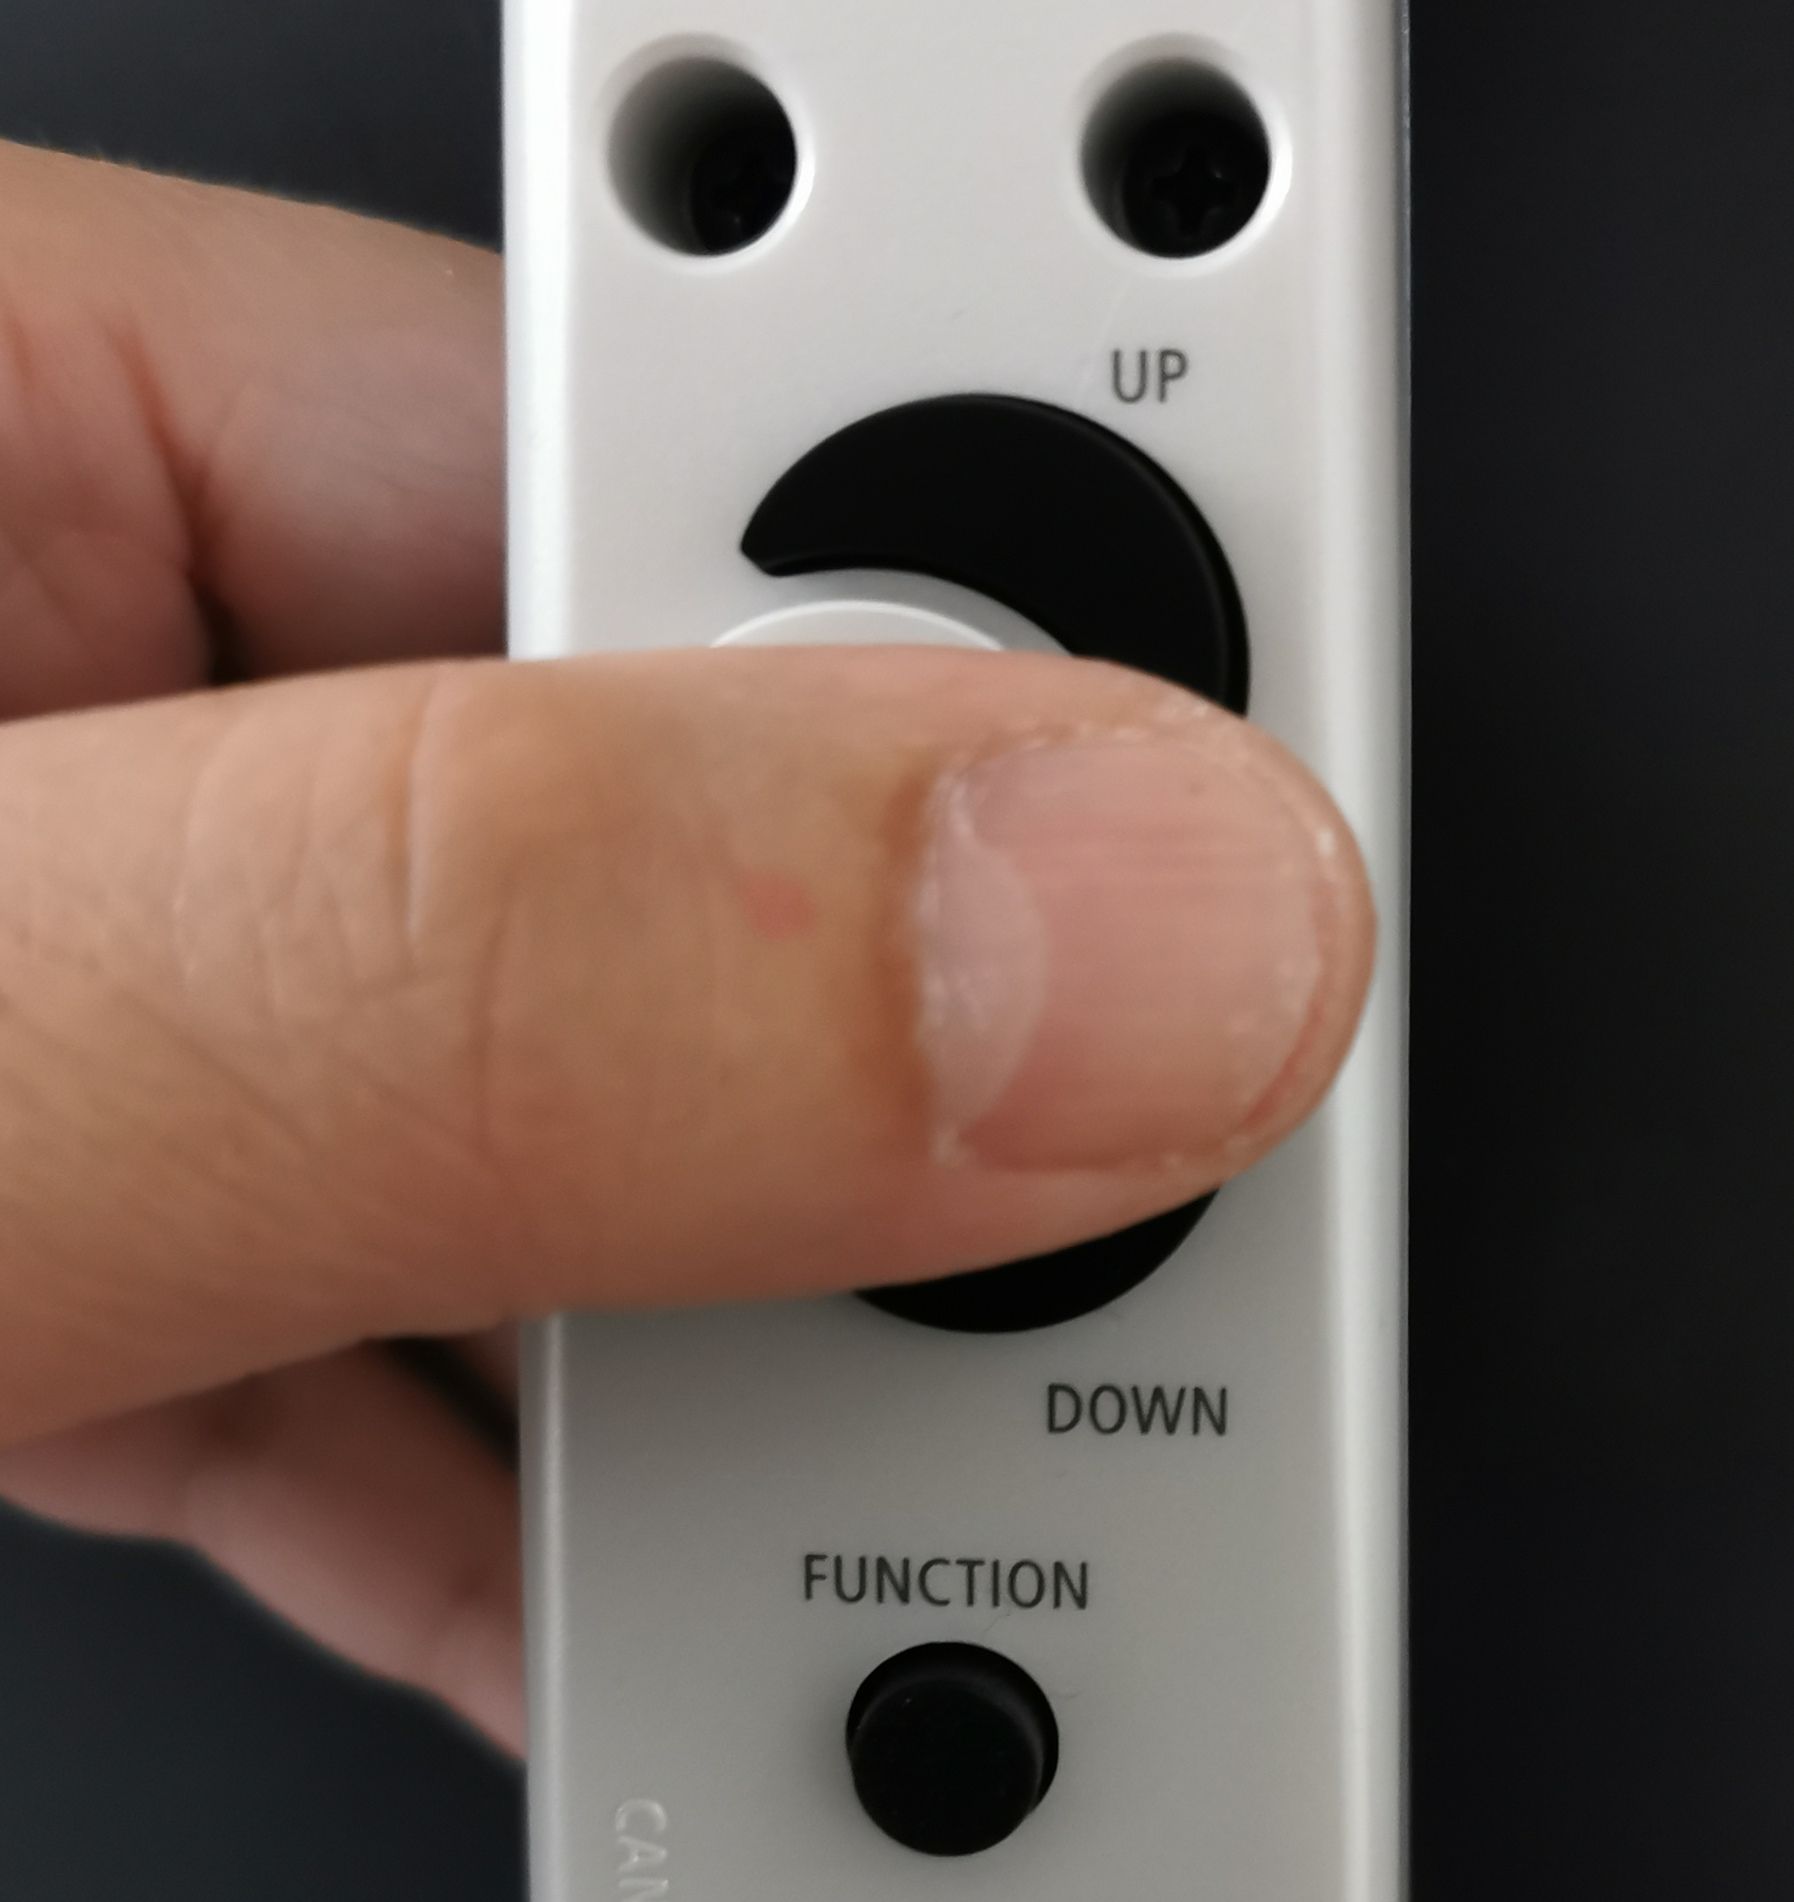
With the Aerophone Mini probably the best technique consists in the combination of the previous two. We should position the tip of the thumb between the rightmost corners of the octave keys, as shown in the following picture:
Then roll&pinch to press the keys:
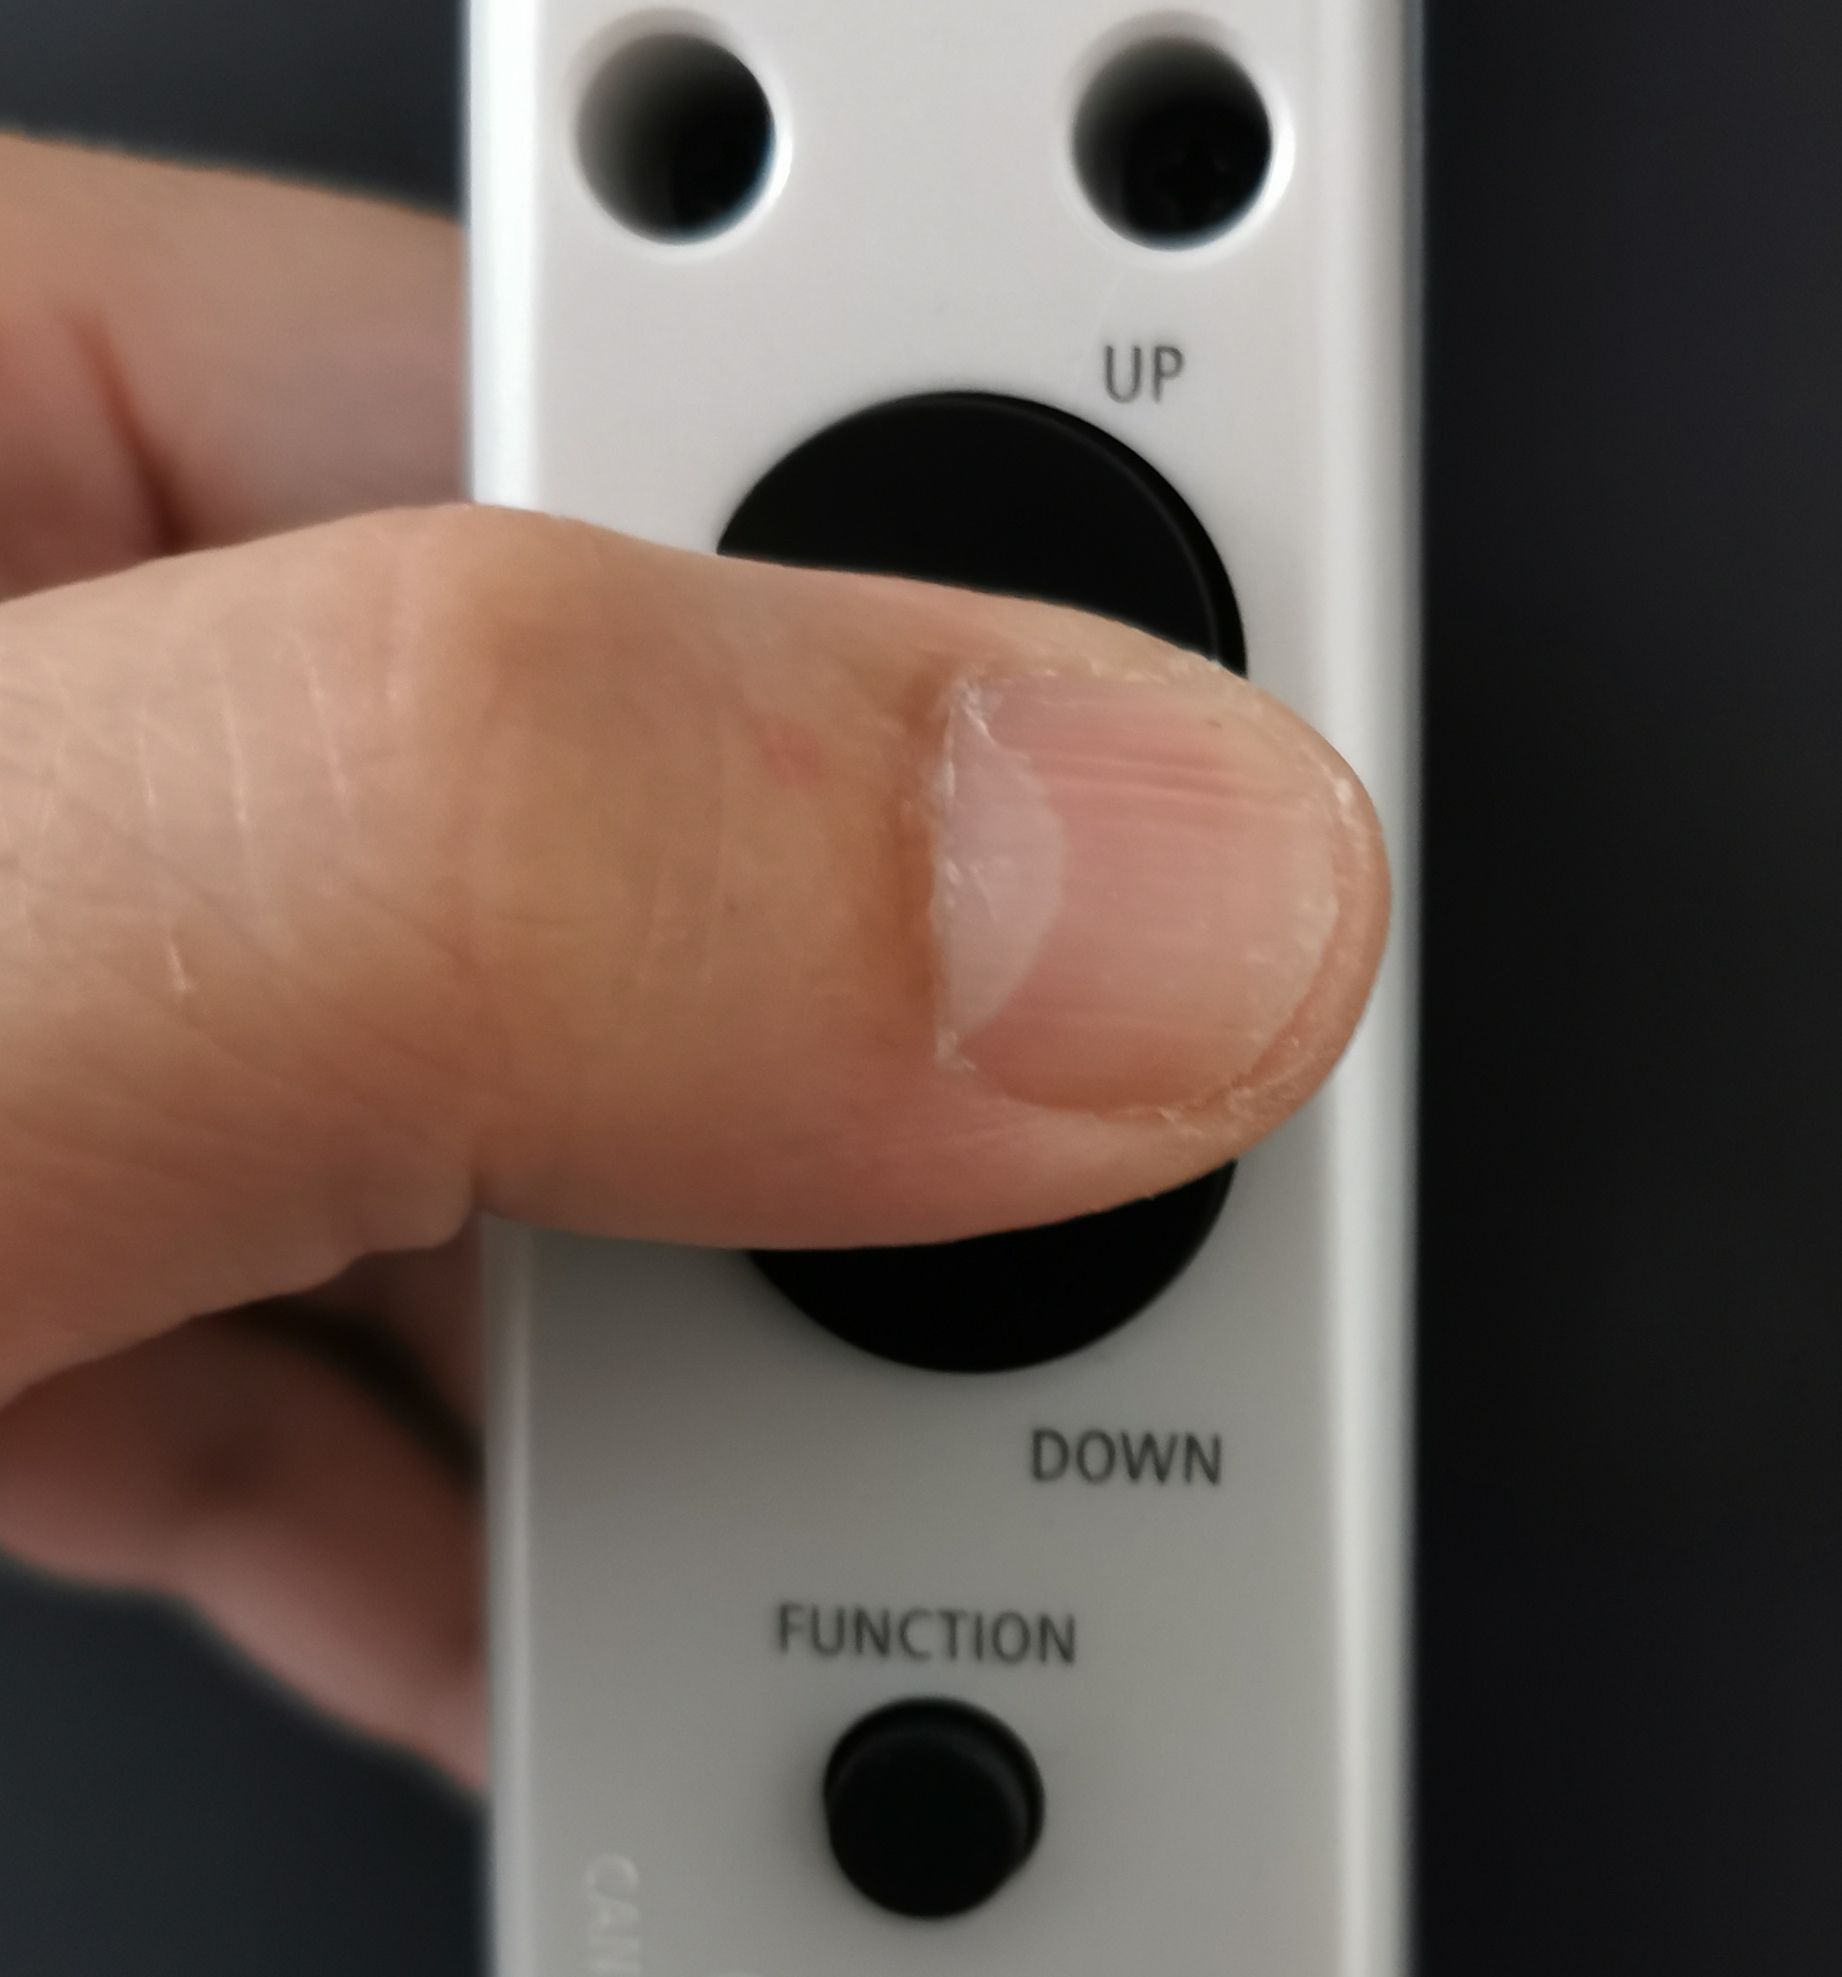
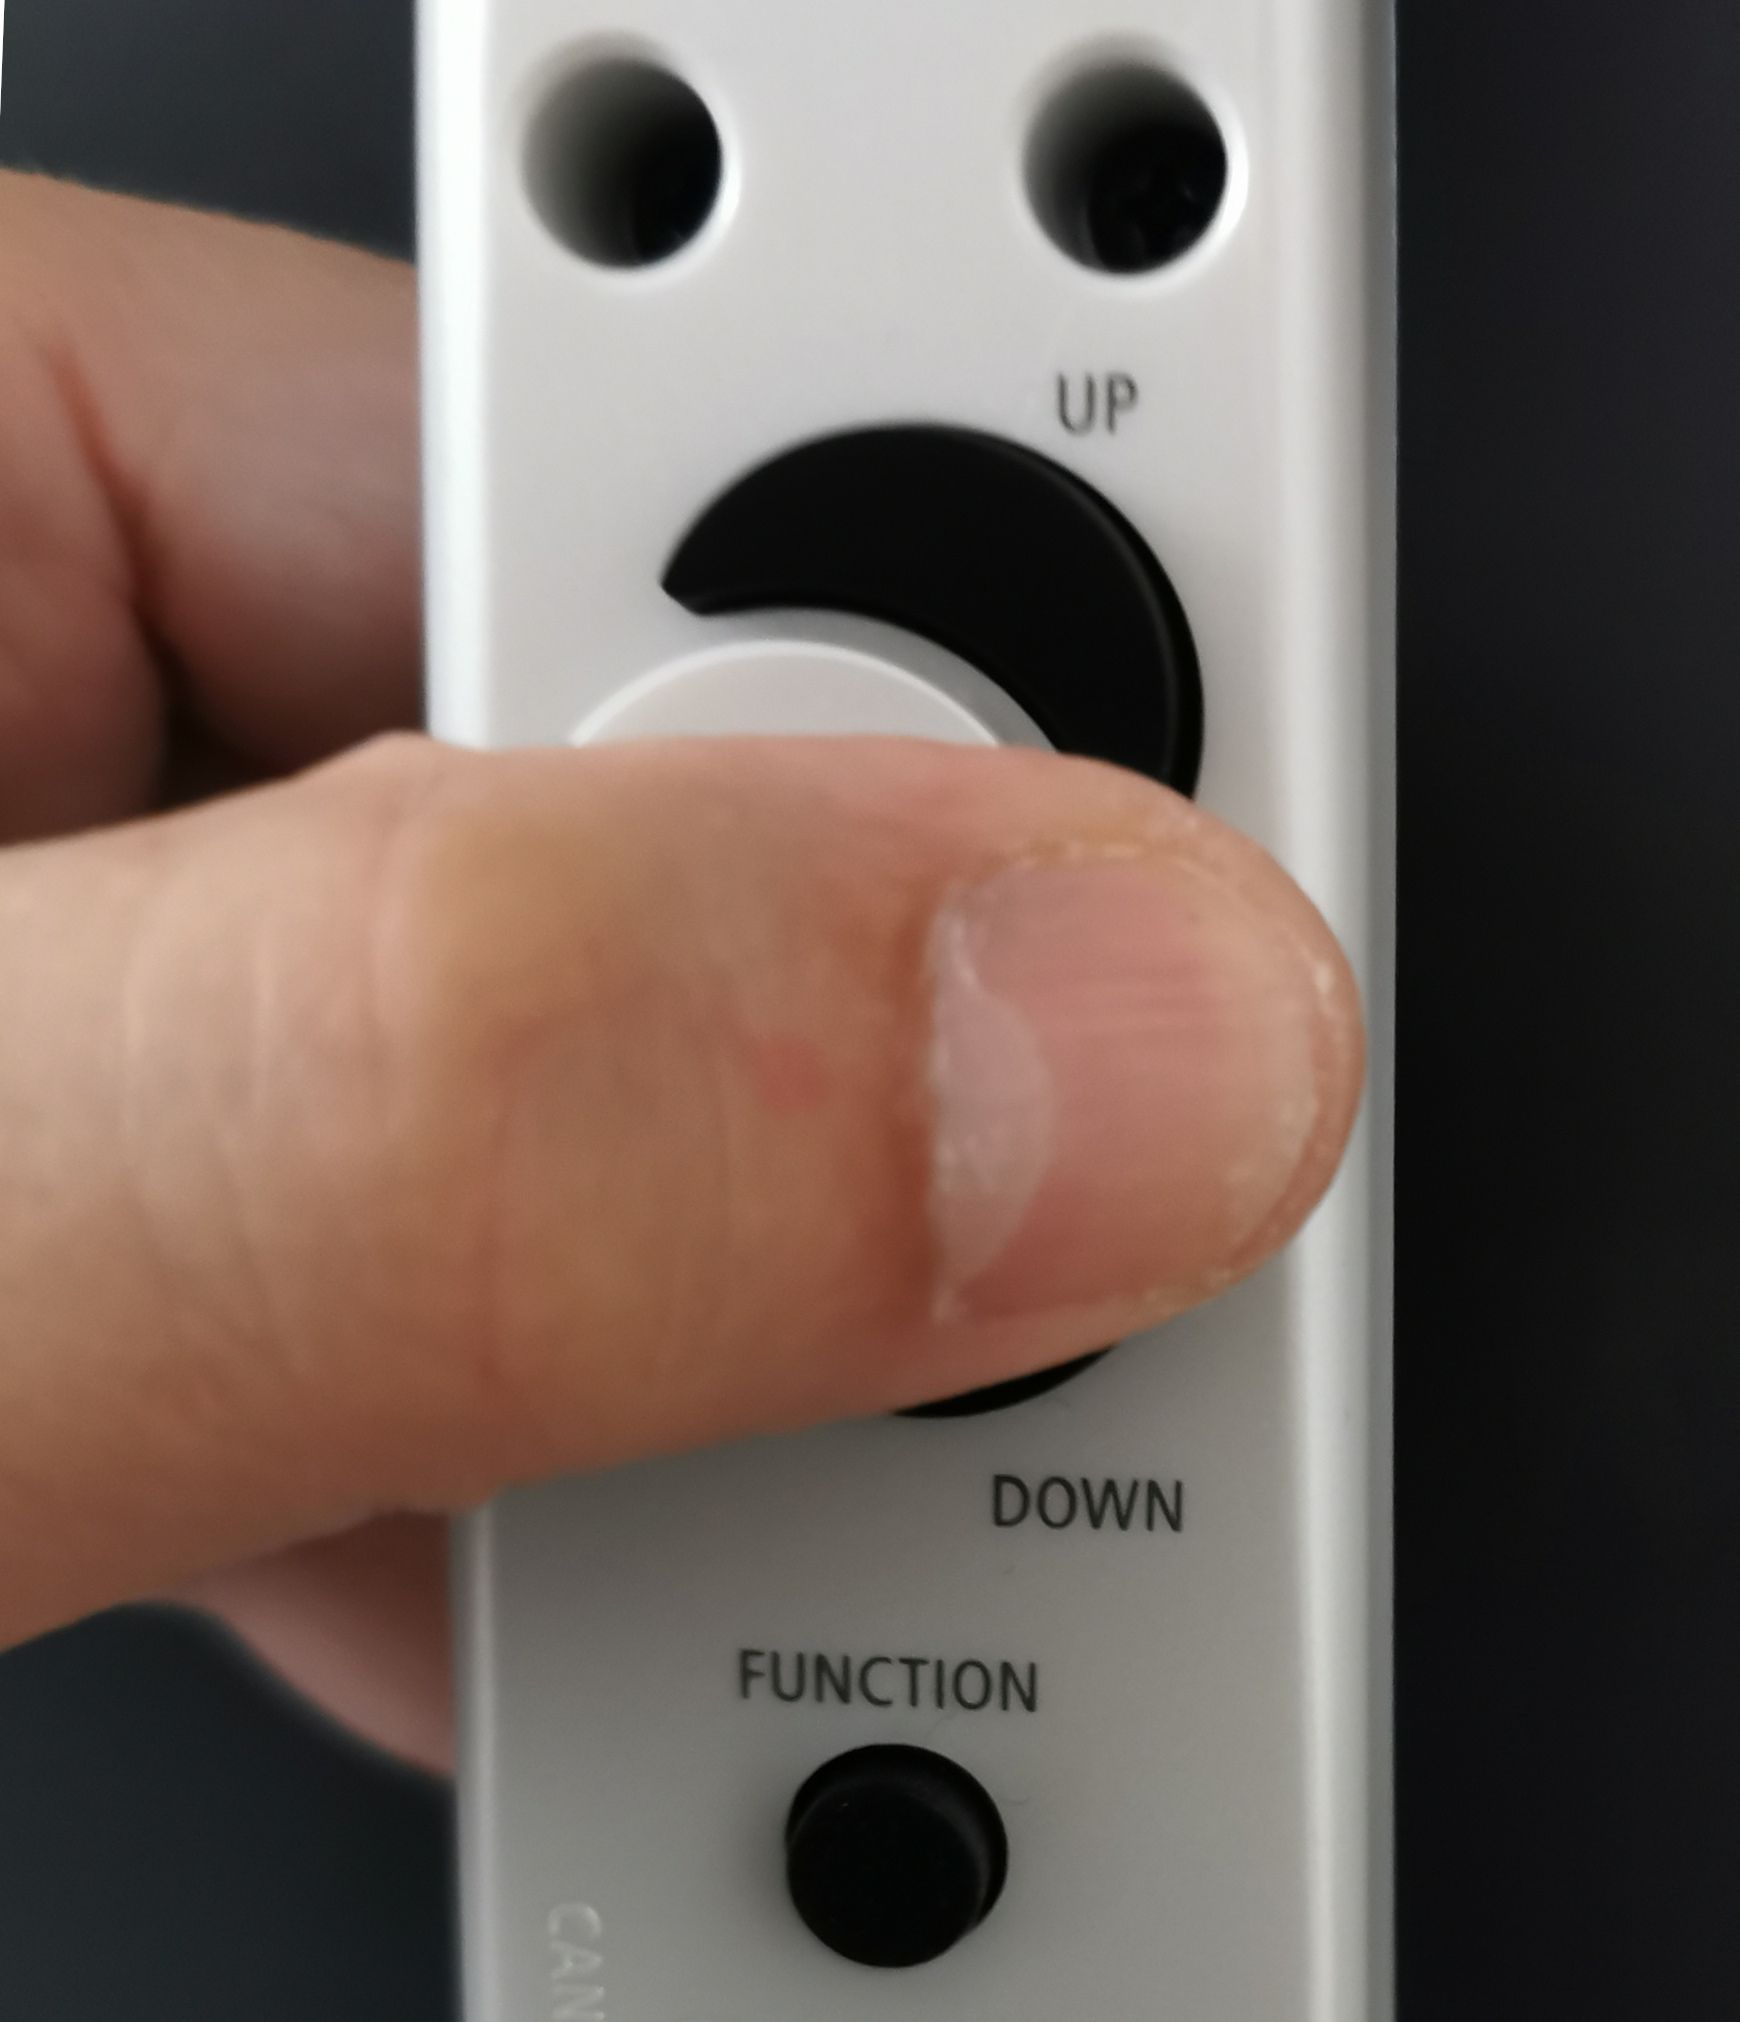
With this technique the thumb never loses contact with the octave keys so that the required movements are the smallest possibile.
Before getting to the exercises, I need to point out that:
You should already have programmed all the alternative and additional fingerings explained in this article, otherwise you won’t be able to play the exercises.
You should play everything legato (use a single tongue articulation on the first note of each repeat only). If you hear glitches, slow down and repeat.
Not all fingerings are shown along the exercises, but only those who might be misinterpreted. When not indicated, the following applies:
Never use the left pinky keys, with the sole exception of the lowest B.
For altered notes (C#/Db, D#/Eb, F#/Gb, G#/Ab, A#/Bb) use the alternative fingerings shown here: in case of multiple choices, use the one that best suits you.
Use the extended fingerings (the ones that extend the octave without using the left thumb), only in the higher register/octave, otherwise use the regular fingering and switch octave with the left thumb.
Do not be scared of the many ledger lines: this is normal notation for wind instruments and I preferred not to use the 8va notation to avoid confusion (except in Exercise #4). For each exercise, the notes are the same as the octaves below: you just have to switch octave with the left thumb keys.
It will take some time, depending on your current skills and the time you spend on it, but all the exercises will have to be memorized and played by heart: being able to do that is the only reliable signal that you have mastered octave changes.
Here we go with the first Exercise.
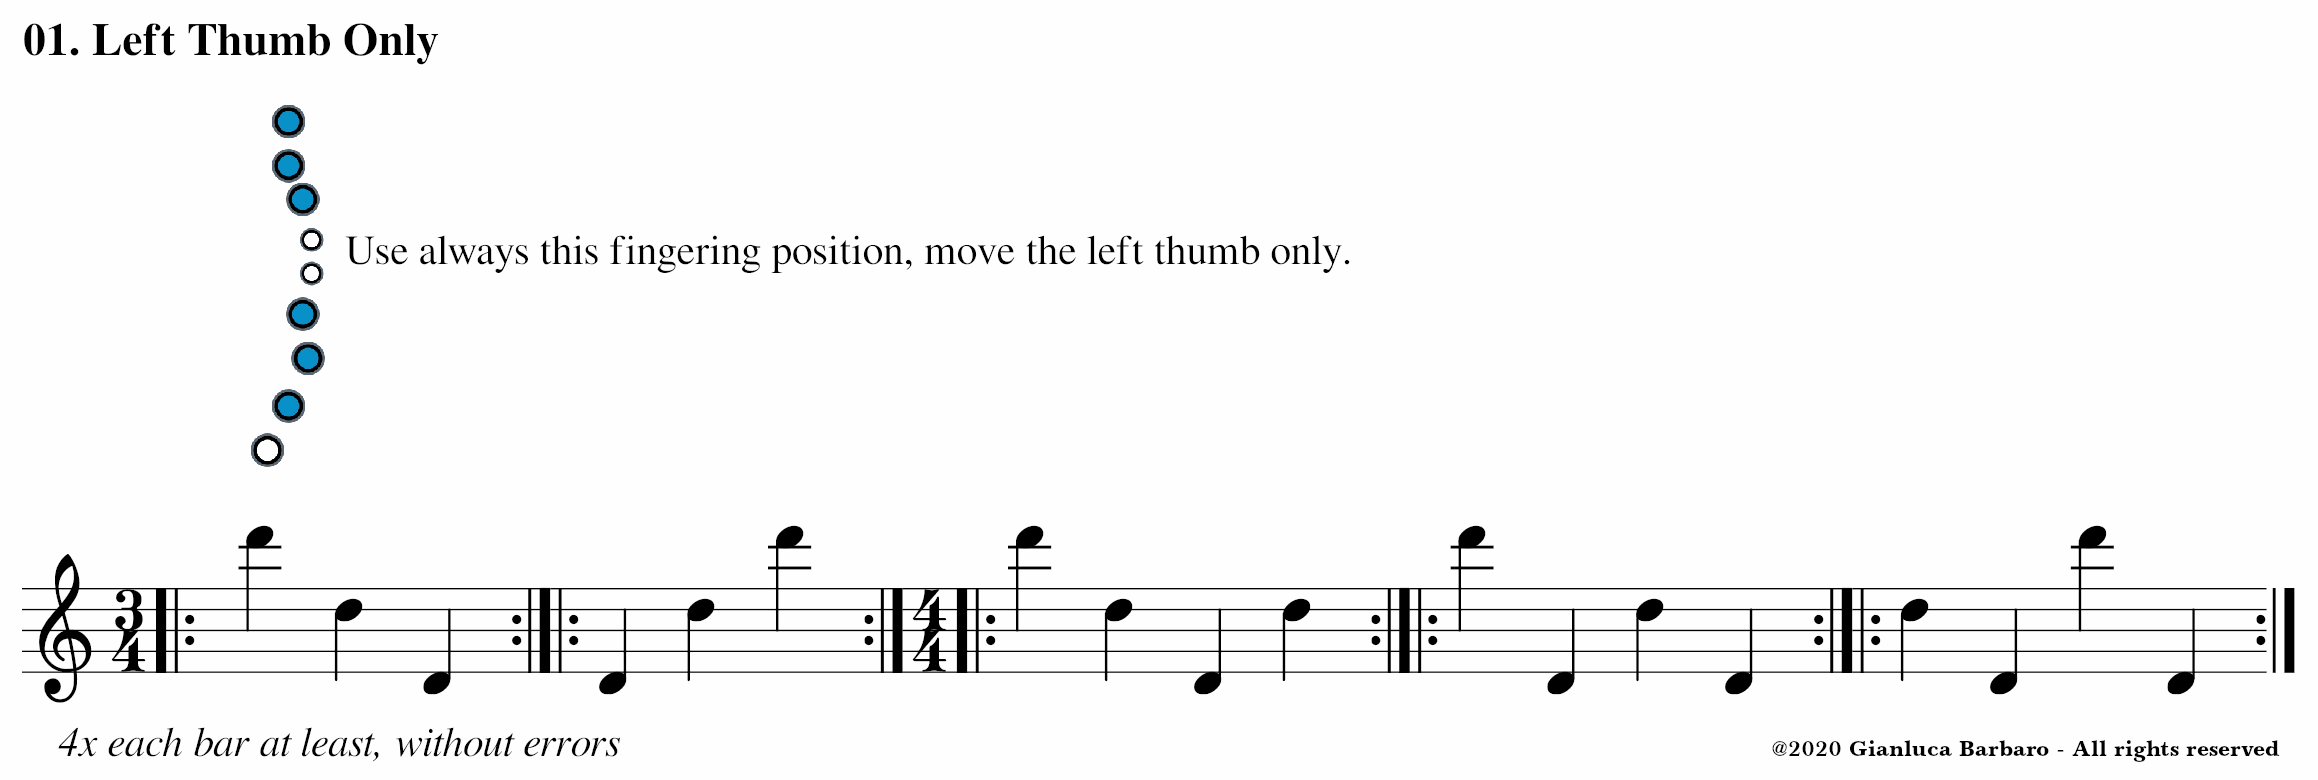
As you can see, we start with something simple: we keep a fixed position with all the fingers (in this case a D, but it might be anything else) and we just use the octave keys, in all possible combinations. If you are changing your left thumb position (and possibly adopting the one I suggested above), this simple exercise can be very useful in getting used to the new technique.
Here is the second one.
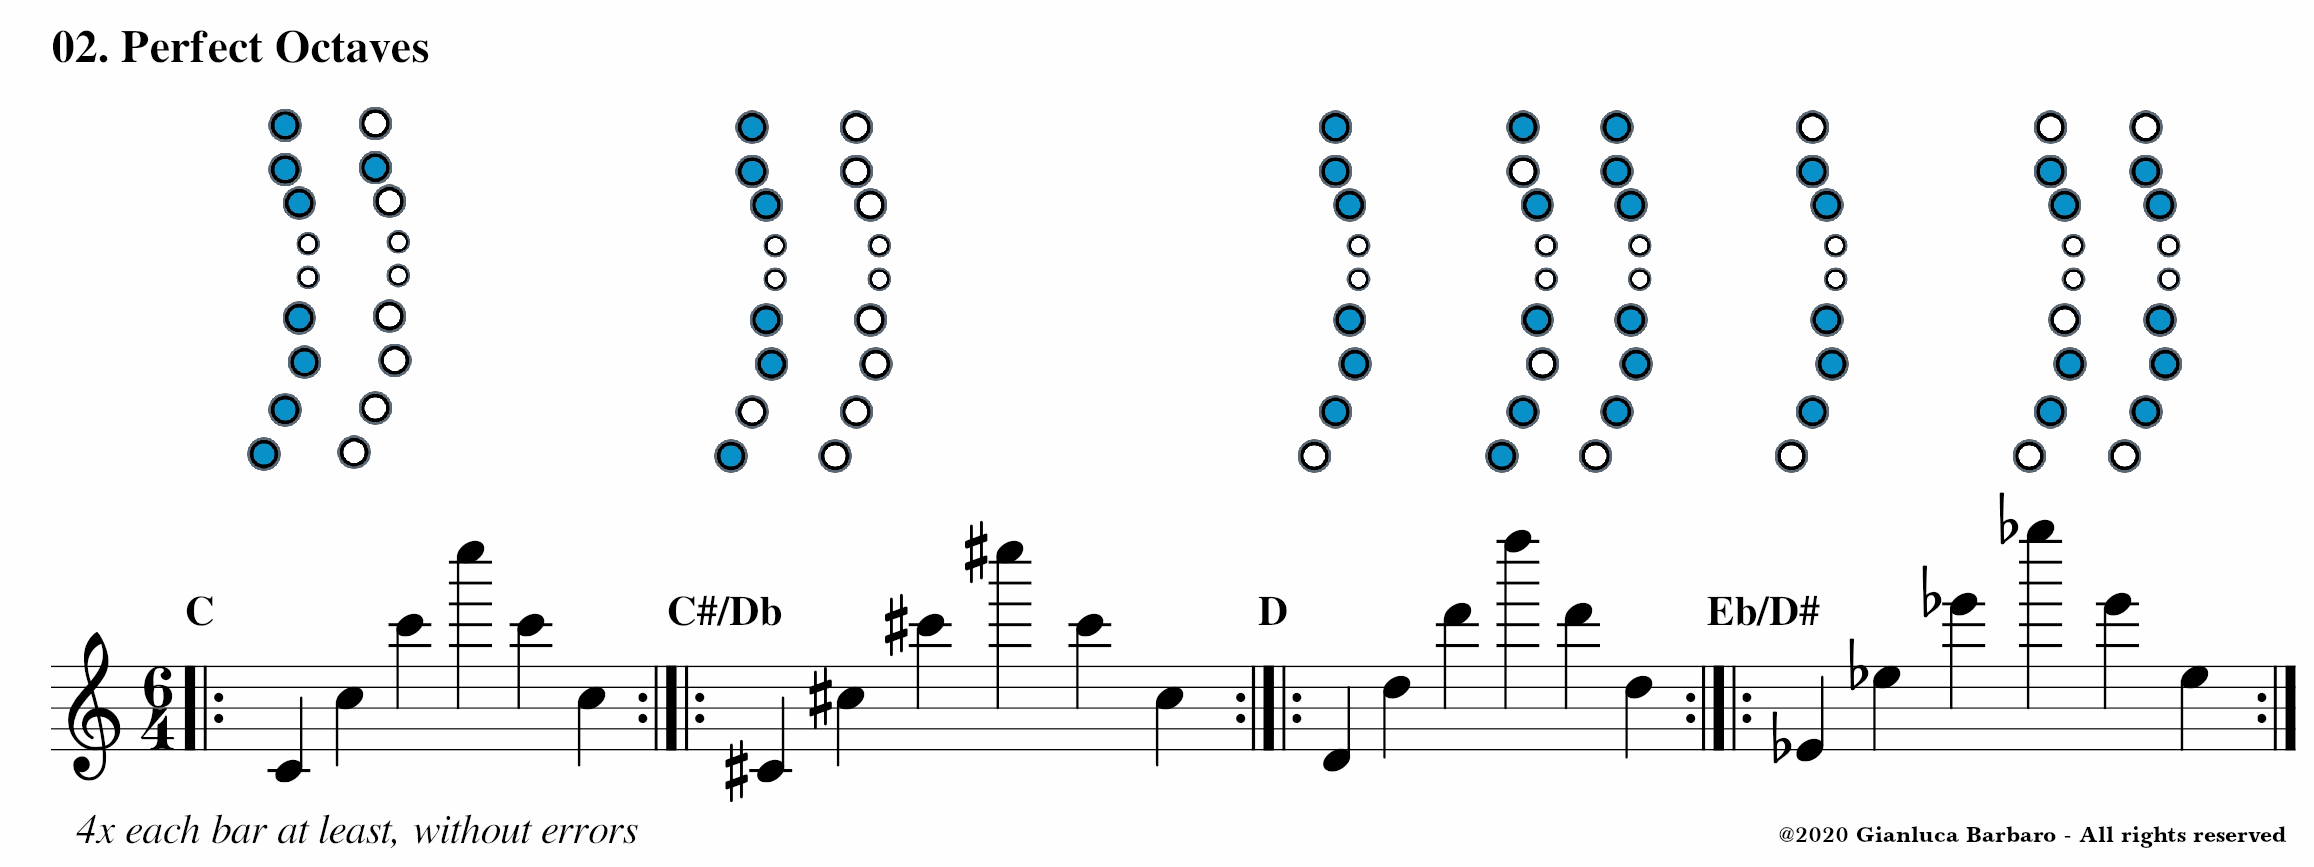


Here we play the same note at all the available different octaves. Besides the left thumb movements, the tricky parts are where we have to change finger position: it might take some time to get a smooth result (without glitches).
That's all for now. I have another 3 or 4 exercises ready to be published in the next few weeks, stay in contact.
EDIT 2020/08/09: Octave Exercises - 2nd part
EDIT 2020/08/21: Octave Exercises - 3rd part
EDIT 2020/08/28: Octave Exercises - 4th part
In the meanwhile, let me know what you think and help me correct any mistake you might find in the exercises. Happy tooting ;)